I found some of my notes on what I did making my socks! In the last post, I just quickly posted the pictures but didn't add my usual goals list, or any information. I'm here to do that now!
Goals for this project:
1. Make a pair of socks!
2. Sample some stitches and decide which one to use.
3. Practice round/spiral start, increasing and decreasing.
4. Ask, did I enjoy Nålbinding? Would I make another pair? What would I do differently?
So, those were my goals. It was a short list because I knew nothing about Nålbinding. What intrigued me was photos of beautifuls mittens and socks made with just a wooden needle and yarn.
As I started my online research, it became clear that the bulk of people doing Nålbinding came to it because they do living history. My interest in this goes as far as thinking about my husband's Viking ancestors, and the surge in Viking history in general. The challenge for me was the thought of making a pair of socks with just a wooden needle! I have made many pairs of socks with 5 double pointed needles and/or 2 or 1 circular needle. This process makes for a very portable project, but could I literally put a wooden needle and some yarn in my bag, and that's all?
Then I saw a picture on Pinterest!
Surprisingly, I'd visited the woman's blog many times before, but for tablet weaving!
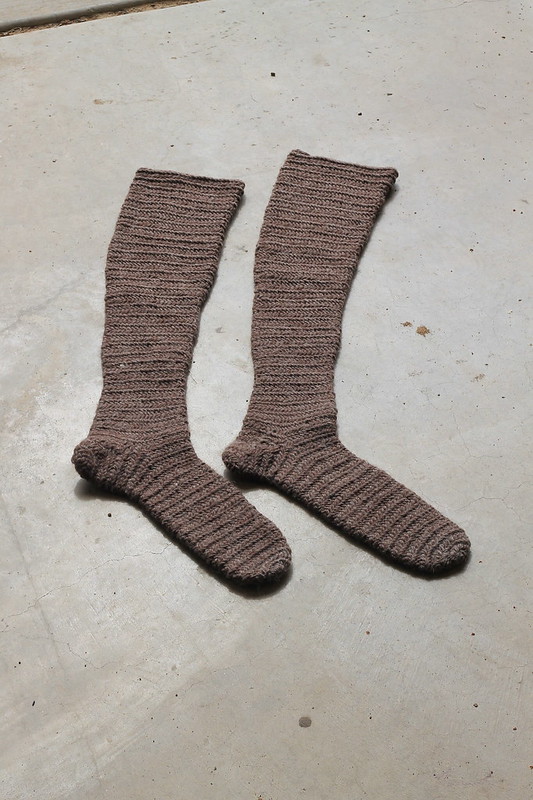
The picture that got me started was a pair of knee highs by Mervi Pasanen! They were beautiful! It's worth checking out her blog as there are other photos of Nålbinding goodies, and I even think there is a tutorial on edging. Anyway, her photo inspired me to make a pair!
And when I say a pair, I meant just socks that came up over my ankle.
And, I think it was Mervi's blog that led me to Neulakintaat website (at this time I don't know the name of the woman who runs the site, but when find out, I will add her name here). There is a TON of information there, and links to YouTube videos.
I practiced the round/spiral start with different yarns in my stash and settled on using Brown Sheep Yarn, 100% wool, worsted weight. I also made the decision to make both socks at the same time, as I have learned from knitting that gauge can change every time you put down and pick up your knitting.
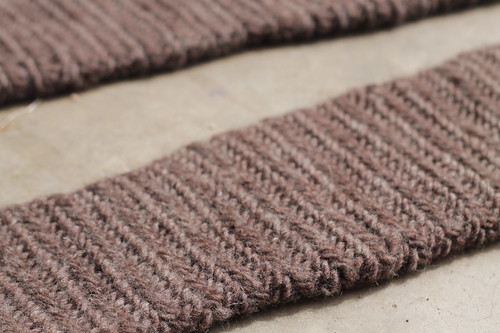
I only tried 2 stitches, Finnish 2+2, and Finnish 1+2 also know as the Mammen Stitch. I am one of those people that can sample forever, and this time I really just wanted to get started. I used stitch markers, which "traveled" due to the spiral nature, will have to figure that out at a later date.
Basically, I started with the round/spiral start with increases, tried on the sock, and continued doing increases here and there until I reached the arch area. I added yarn using spit slicing. I stitched half way across, then added an equal amount of thumb stitches and rejoined.
Continuing along, I worked the lower and upper leg with a few decreases and plenty of increases. After that, I went back to do the heel, working a round/spiral decrease. Originally I wanted standard socks, but had enough yarn to keep going.
I started the socks on 16 November 2014 and finished them 9 January 2015.
What I learned:
I absolutely love Nålbinding!
The fabric is dense and warm. Nålbinding does not stretch widthwise, but it does lengthwise, so this would need to be taken in consideration if you were felting the fabric as seen mittens.
I don't really love the heel, it is sort of a Heel Type A but not as noted at Shelagh Lewins site. And as I read online, they are tight thru the ankle while putting them on. I don't really think there is much to do about that. Next time I will either try Heel Type A (adding on the heel cup) or Heel Type E.
I am planning on doing another pair of socks with a different heel and a pair of fingerless mittens!
Note: Also saw on Mervi Pasanen's blog that she will be coming out with a book about Nålbinding, I know it's in Finnish, but hoping there might be some English???
Resources:
Mervi Pasanen's Knee High Socks
Nålbinding Thread Mervi Pasanen's Blog
Neulakintaat Round/Spiral Start - Video
Neulakintaat Mammen/Korgen/Finnish 1+2 Stitch - Video
Neulakintaat Increasing/Decreasing - Video
Neulakintaat Ending/Finishing Edge - Video
Spit Splicing
Shelagh Lewins Heel Type/Construction Page - Heel Type A