Tuesday

Weft Twining Mini Rug

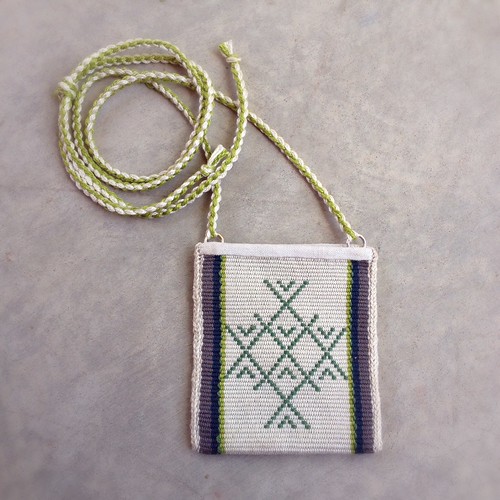
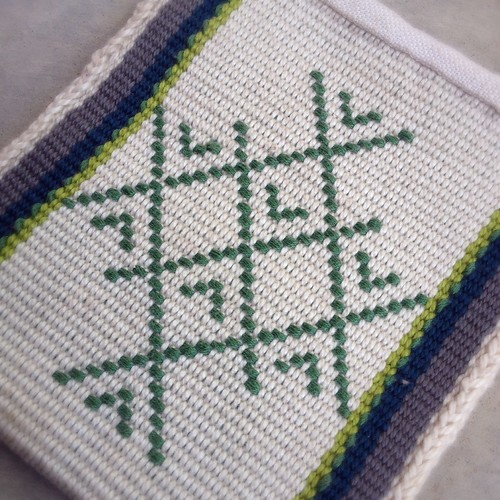
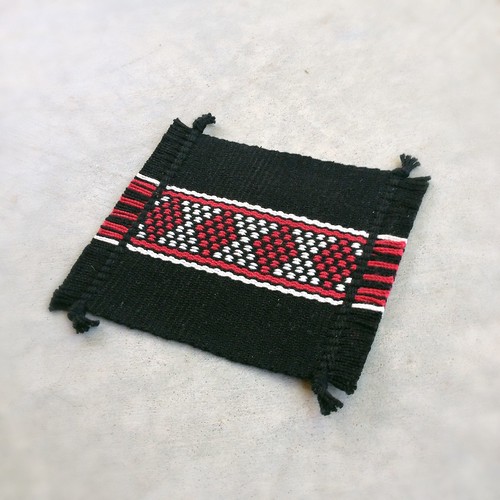
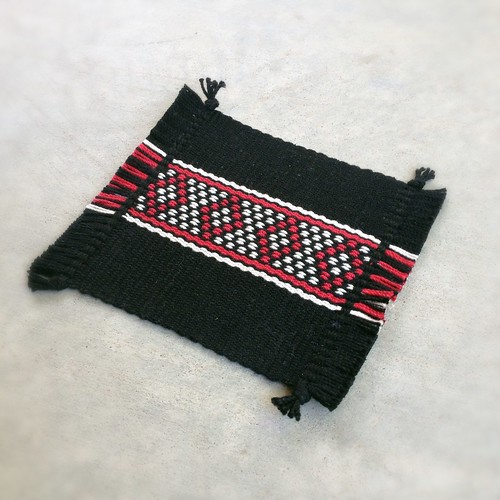
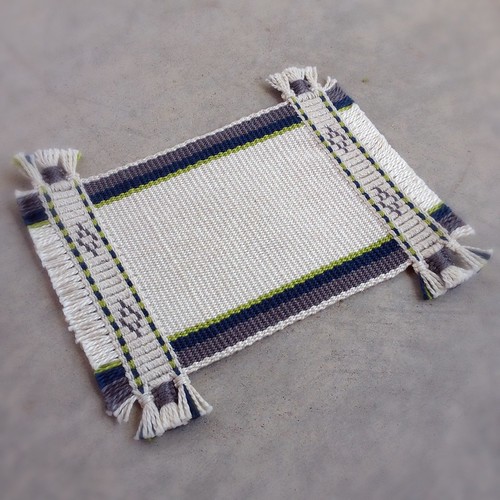
.mini rug with various types of weft twining.

This is one of two projects woven on the same warp. Intially, I had adapted a supplementary weft pattern to do on this rug, but after about 10 rows, I just didn't like how it was weaving so I took it out and decided to just concentrate on the weft twining.

Before I go on about this project I must share some cuteness......

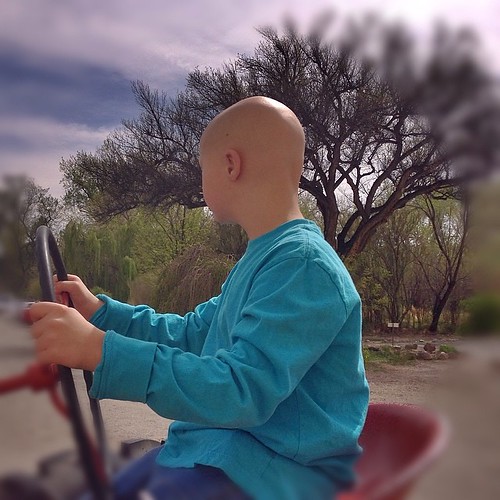
.loving on the tractor.
.tractor dreaming.
.so so sick he could not move :(

We've spent the whole month with various illness. It's been a bit of bummer! And I thought I was going to get thru it with just a milder version of the stomach flu the kids had, but then we got a cold. The kids are now doing good but I knew something wasn't right with me; I can't walk normal speed without my head feeling like it's going to explode and (laugh) I don't want to weave at all, like not one bit! Well, I have a raging sinus infection, last time I had one like this it was 20 years ago!!!

I finally decided to lift my "ban" on buying books. Honestly our library was so large that each time we moved it was crazy the amount we had. So over the past six years I have either sold or donated books I no longer use, and for the odd purchase I was using my kindle app on my iPad. But the time came around where I "needed" a few books, mostly for weaving. A lot of those books are out of print, but I will share 2 that I purchased on recommendations at Ravelry.

Now back to weaving!

Goals for this project:

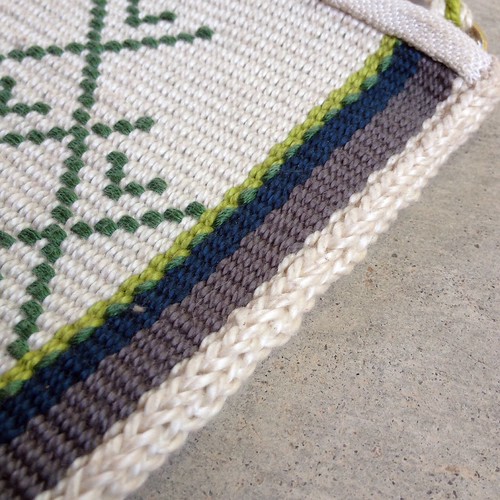
1. Continue working on producing a beautifully balanced warped face simple weave with neat selvedges.

2. Use basic weft twining.

3. Use two-color weft twining.

4. Attempt countered twining.

5. Decide how to deal with the weft ends from twining.

Interestingly, I had mentioned on the backstrap weaving group on Ravelry that I have noticed a change in my weaving. I am settling into rhythm and other than making adjustments due to using different brand yarns, I have been able to just settle into the weaving and not have so much anxious thought about how the weaving is going to turn out. I do occasionally take out the ruler just in case, but I really just relax now and weave away. My edges are also turning out better, so happy about that.

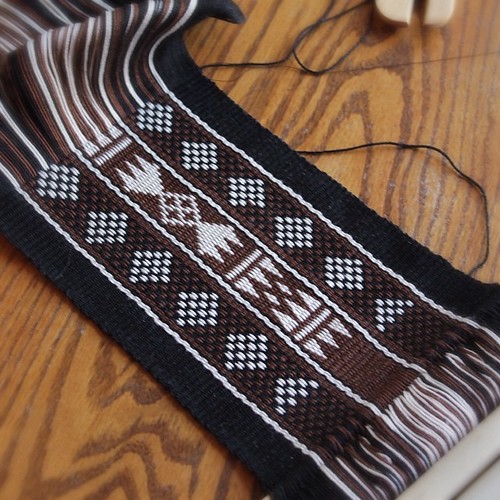
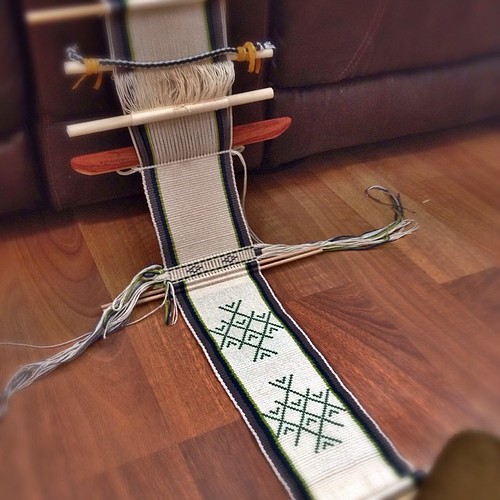
.the two projects on my warp, this rug is at the top.

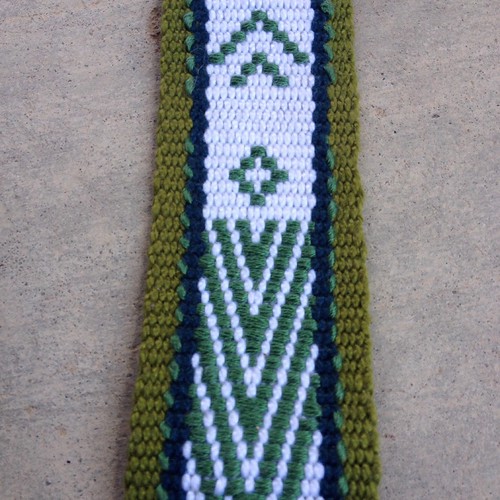
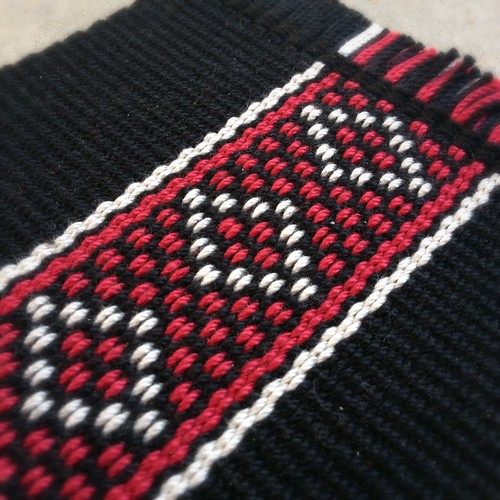
I've been doing basic, one-color weft twining for awhile, generally not doing more than 6 rows. In this project I did a total of 8 rows dispersed in the weft twined band.

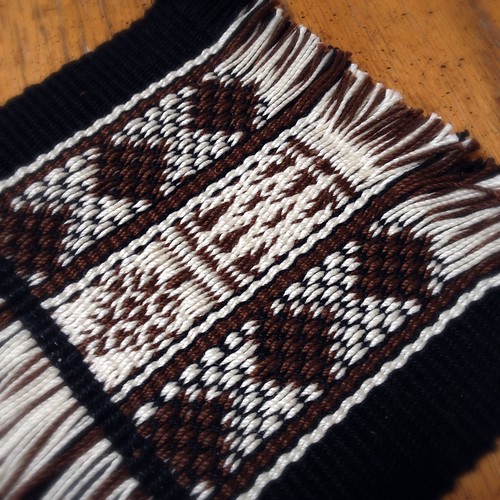
Okay, so the fun begins! I did two rows of countered twining dispersed in each band. Had no problem doing it, BUT I do think because I do beat the warp every few rows the detail in the countered twining got compressed (squished). It should look more like a knitted stitch, but compressed it starts to look like two-color twining. It's okay for this project and does bother me but it's interesting to note this for future projects.

The two-color weft twining came out better than I thought it would. I was really aprehensive about that extra twist needed to bring the right color to the surface and how the fabric may change size due to the bulkiness of this type of twining. Luckily all worked out well.

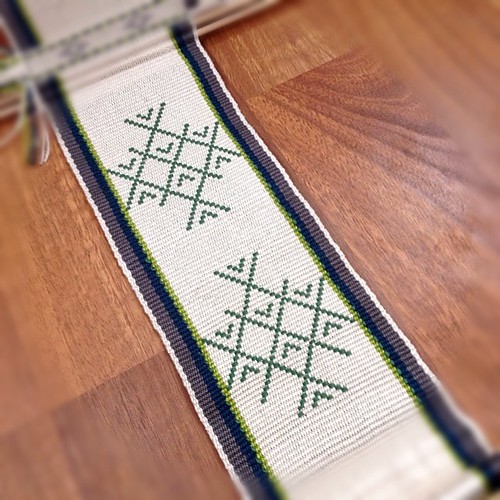
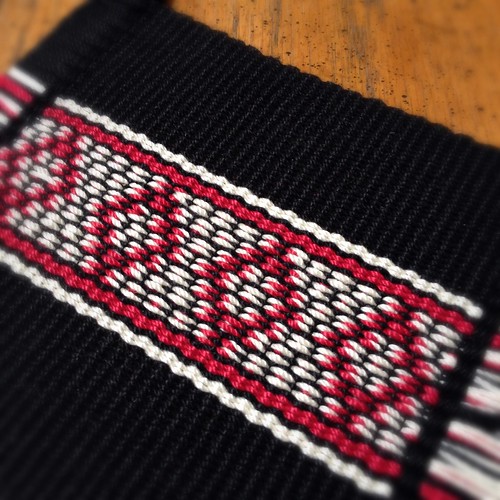
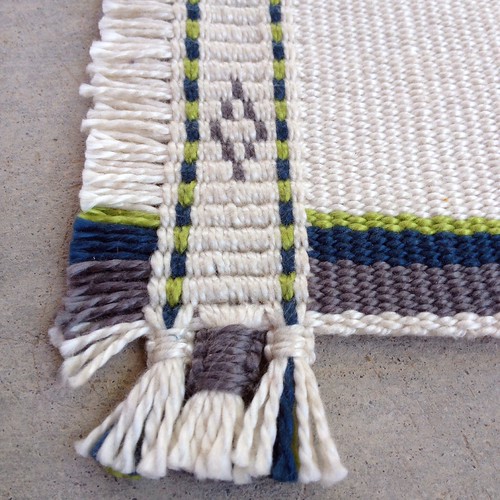
Here's the interesting part. I was advised that if I was working both one-color and two-color in the same project I should treat the one-color twine as if it was a two-color twine, meaning, do extra twists as if it was two-colored. I didn't do this, and now I can see why I might want to do this. If you look closely at the photo, you can see that the two rows of white weft twining visually look different than the two-color weft twining. It does not bother me for this project, but again, it's interesting, and to note this difference when planning future projects.

.from left to right: basic twining, countered twining, two color twining, and macrame square knot.

Weaver-Speak: I am excited to do more two-color weft twining in the future and especially experiment with that little bead of color that can be produced by the twist. For this project, I made sure to tug the weft down to change colors, but it would be fun as a design element to use that "little bead" of color.

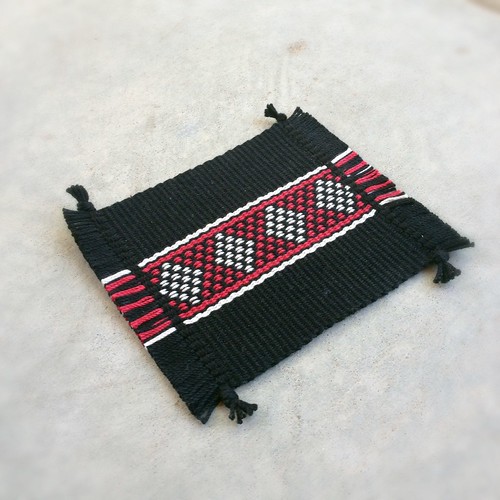
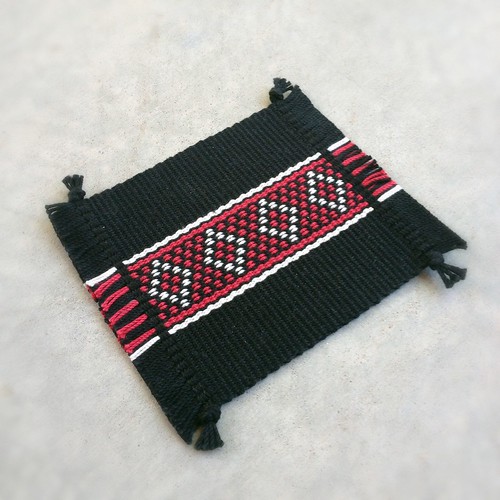
Lastly, and probably the most worrisome part of this project for me was what the heck to do with all the weft threads. Because I usually do 4 or 5 rows, a knot has been the way to go for me for it measures about the same as the band. But here, I felt a big knot or a bunch of smaller knots just wouldn't look right. I decided to try out a macrame square knot. Since this is the first time I've done this, I'm not sure if I will continue this way, but it felt like it worked for this project.

Oh, and I want to add that I did the weft twining under tension on my backstrap loom. There are lots of tidbits at Laverne's blog about weft twining, and if you want to learn how to do it, she had video tutorials here. Also, if you search the Ravelry Backstrap Weaving Group there is info/input to be gleaned there and project notes about twining.

Overall, I am happy with how it turned out, and I am building my skills for future projects!

Okay, now for the links: Weft Twining, and this book I got for $3 at amazon:

Taaniko, Maori Hand Weaving

This book has fantastic pictures if you are a visual learner!

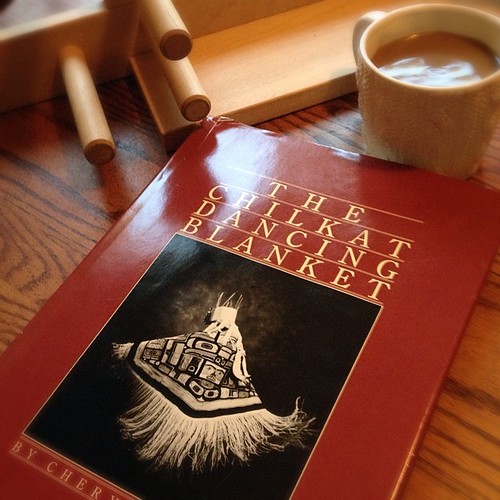
The Chilkat Dancing Blanket. I did not use this as a source for weft twining, but these blankets are made with twining. This book is about the Tlingit of Yakutat, Alaska to Vancouver, BC that wove these robes. The book includes origin stories, fantastic photographs, and instructions on weaving. This book cost about $12 on amazon, and was worth every penny.

I've got a few project ideas brewing and new techniques to learn! See you soon :)


Wednesday

Supplementary Weft Bag With Bhutanese Motif

.bag with supplementary weft pattern, cross knit looping, and 4 strand braid.

This is one of two projects that came off the same warp. The colors are a bit on the light side for me, but the weaving process was pleasurable, and I learned how to do supplementary weft on a wider project.

So, here were my goals for this project:

1. Use Supplementary Weft patterning.

2. Weave my picks (rows) evenly to get even dimensions, and to weave neat selvedges (edges).

3. To make a bag use no electric devices.

4. Use hardware and attach a 4 Strand Braid.

5. Apply a 3 stitch wide Cross Knit Looping to the edges.

6. Use the bag to note the wear and tear and what I might do differently in the future.

The idea for some of the goals for this bag came from my friends. One friend in particular does ALOT of walking for exercise, and she wants a bag to keep her phone, license, and a key in. I made the yurt band motif bag as a sample, but it is not big enough for my iphone, or rather the case that my iphone is in. So I kept that in mind for this project.

.the practice sampler.

I used size 3 cotton that I had purchased from my local yarn store. It is different in texture than the size 3 crochet cotton yarn I normally use. The crochet cotton yarn has more twist, and well, I really like that. The cotton from the yarn store has less twist but a nice sheen. I am going to guess here as to refer to brand and I have seen it as Astra.

.weaving in progress.

I followed the online tutortial and used 2 strands of embroidery floss for the supplementary weft. I had two charts I wanted to use, one was a bhutanese motif, and the other was and adaptation from Laverne's blog. You can see my adapted chart in the photo, and about 10 rows in I decided I didn't like it. I will save it for another warp.

.both sides done!

I had no problems doing the supplementary weft and the weaving went quickly. After weaving, I hand-sewed a cotton/linen blend fabric to the top edges. I wanted to NOT use my sewing machine this time around.

.close up of cross knit loopin.

I practiced and practiced the cross knit looping on a sample piece until I completely could identify the stitches using the same color yarn and could reproduce consistency in the loops. I applied this to the side edges of the bag. I then hand-sewed hardware to the top to attach a 4 strand braid.

.bhutanese motif.

Not using electrical equipment, well I sorta cheated, I did use my iron on the fabric (because I didn't have my cast iron one handy, just kidding). I wanted to see if I could put something together without relying on modern technology, and now I know I can.

I'm happy with this project and using the bag to test it's structure. I'm pretty hard on my bags, so we'll see, and if it holds up, I will be making a few more!

Link love: Supplementary Weft Tutorial, Cross Knit Looping Tutorial, 4 Strand Braid Tutorial, Textile Designs of Bhutan - David Barker (you need to be signed into issuu to view this document).

This project is at my Ravelry page: Supplementary Weft Bag.


Monday

Mini Rugs With Al'ouerjan Warping & Weft Twining

a set of mini rugs using the al'ouerjan warping method.

This project was kind of amazing for me. For the first time I felt completely settled into the backstrap weaving process. But before I get onto that I have to back track a bit. And at the end of this post I will provide the links for tutorials that are available on the web.

I started with samples of warp substitution and al'ouerjan warping to practice using my trusty size 3 cotton. The samples went along fine, and I was able to practice supplementary weft using thread to secure the warp floats on the back.

warp substitution and al'ouerjan samples
al'ouerjan and warp substitution samples.

Then I spent ALOT of time charting for a wider piece using these techniques. Although this piece looks better off loom than on, I felt it was plagued with problems, that eventually made me not want to weave on it anymore. Looking at it now, it's not that bad, and the piece is large enough to practice other techniques for making bags, so I will save it for that.

the original piece that I wanted to weave turned into a sampler.

So, the problems. The first thing I ran into was the chart I made did not match then shed set-up on the loom. I really learned a lot in regards to charting for a project, and it's harder than it looks. But the end result is that now, using 4-stake warping board, I can actually identify which stake belongs to which shed. I know this may sound like Greek, but if you happen to go this route, you'll know what I mean.

This was also the first time I dealt with 1/2 revolution warps, and it was a lot to get my mind around (wondering what a revolution is? Check it out here).

I spent more time re-drawing my chart, modified this time without all the detail I had the first time around. I wish I took a picture of it before I threw it out!

back of woven piece using supplemental weft thread.

Finally, I got to sit down and weave, the first few inches went fine, but I was really having a hard time with one of the selvedge edges. I inserted a second coil rod, and it helped, but eventually, my warp tension was all over the place. The weaving just didn't feel right, and I spent more time making adjustments than weaving.

At this point I had woven about a foot and I wasn't liking it. So sampler it became, and I went on to practice weft twining.

I thought at first it was because it had been the widest piece I'd woven, and that was part of it, but ultimately, it all boiled down to sloppy warping on my part.

Taking a deep breath, I decided to make more mini rugs. Here were my goals for this project:

1. Use al'ouerjan warping technique in traditional colors.

2. Make 4 mini rugs using 4 different combinations in the al'ouerjan warp.

3. Pay close attention to my warp tension as I wind the warp on the warping board.

4. Weave evenly with neat selvedges.

5. Use 1 color basic weft twining to edge each rug.

6. Use a coil rod.

7. Use a supplementary weft thread to secure the long warp floats.

Whew! That seems like a lot, but here was the magic in it for me: everything fell into place. When I sat down to weave I did a few rows to establish width, and some weft twining to see how many warp bundles I wanted to twine (glad I did it, for the number of warps I wanted to bundle changed fron the last project I did using the same size yarn).

rug # 1 red diamonds
rug # 2 white diamonds
rug # 3

My edges became so very consistent that I was amazed, I hardly had to use my ruler to measure. I don't assume that this will happen often, but it sure was nice this time. And using the supplementary weft thread to secure the long warp floats on the back of the fabric really neatened everything up.

rug # 4, close up of warp
rug # 4, my favorite!

So I played around with different arrangements and the two photos above is my favorite. I noted this (what row to start the patterning on for it to look balanced) in my journal for the time I make these rugs again for gifts.

close up of back of rug using supplemental weft thread

Overall this was one of the most relaxing projects I've done so far. I will go back one day and re-try my original draft when the mood strikes me. I haven't tried the warp substitution, other than to practice the patterns in another technique called one-weft double weave.

If you are interested in learning these techniques, they are available at Laverne Waddington's Backstrap Weaving Blog: Warp Substitution, Al'ouerjan Warp, Supplementary Weft Thread, Using a Coil Rod, and Basic Weft Twining.


Related Posts Plugin for WordPress, Blogger...