 |
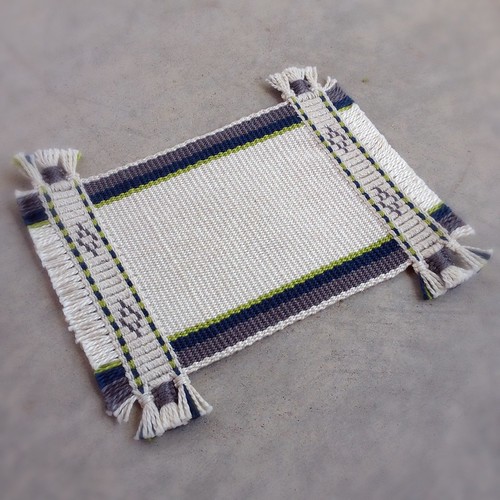
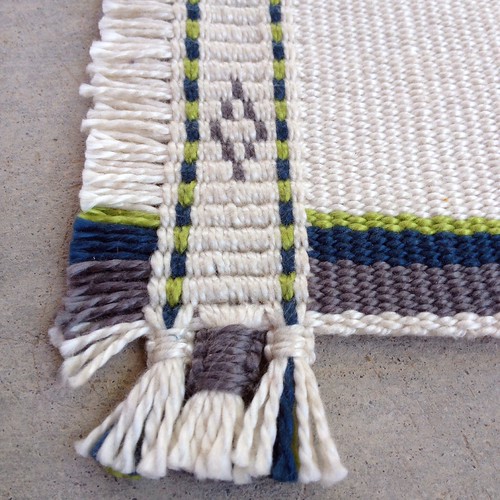
| .mini rug with various types of weft twining. |
This is one of two projects woven on the same warp. Intially, I had adapted a supplementary weft pattern to do on this rug, but after about 10 rows, I just didn't like how it was weaving so I took it out and decided to just concentrate on the weft twining.
Before I go on about this project I must share some cuteness......
 |
| .loving on the tractor. |
 |
| .tractor dreaming. |
 |
| .so so sick he could not move :( |
We've spent the whole month with various illness. It's been a bit of bummer! And I thought I was going to get thru it with just a milder version of the stomach flu the kids had, but then we got a cold. The kids are now doing good but I knew something wasn't right with me; I can't walk normal speed without my head feeling like it's going to explode and (laugh) I don't want to weave at all, like not one bit! Well, I have a raging sinus infection, last time I had one like this it was 20 years ago!!!
I finally decided to lift my "ban" on buying books. Honestly our library was so large that each time we moved it was crazy the amount we had. So over the past six years I have either sold or donated books I no longer use, and for the odd purchase I was using my kindle app on my iPad. But the time came around where I "needed" a few books, mostly for weaving. A lot of those books are out of print, but I will share 2 that I purchased on recommendations at Ravelry.
Now back to weaving!
Goals for this project:
1. Continue working on producing a beautifully balanced warped face simple weave with neat selvedges.
2. Use basic weft twining.
3. Use two-color weft twining.
4. Attempt countered twining.
5. Decide how to deal with the weft ends from twining.
Interestingly, I had mentioned on the backstrap weaving group on Ravelry that I have noticed a change in my weaving. I am settling into rhythm and other than making adjustments due to using different brand yarns, I have been able to just settle into the weaving and not have so much anxious thought about how the weaving is going to turn out. I do occasionally take out the ruler just in case, but I really just relax now and weave away. My edges are also turning out better, so happy about that.
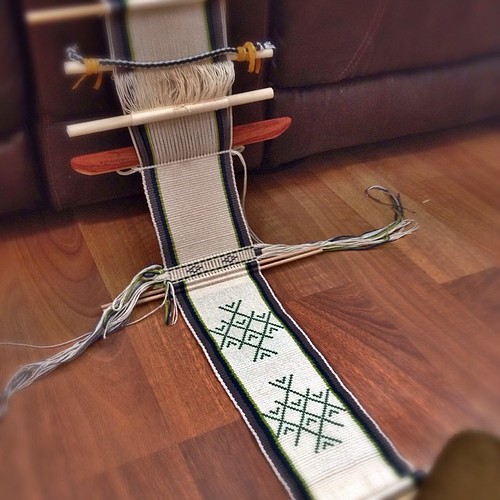 |
| .the two projects on my warp, this rug is at the top. |
I've been doing basic, one-color weft twining for awhile, generally not doing more than 6 rows. In this project I did a total of 8 rows dispersed in the weft twined band.
Okay, so the fun begins! I did two rows of countered twining dispersed in each band. Had no problem doing it, BUT I do think because I do beat the warp every few rows the detail in the countered twining got compressed (squished). It should look more like a knitted stitch, but compressed it starts to look like two-color twining. It's okay for this project and does bother me but it's interesting to note this for future projects.
The two-color weft twining came out better than I thought it would. I was really aprehensive about that extra twist needed to bring the right color to the surface and how the fabric may change size due to the bulkiness of this type of twining. Luckily all worked out well.
Here's the interesting part. I was advised that if I was working both one-color and two-color in the same project I should treat the one-color twine as if it was a two-color twine, meaning, do extra twists as if it was two-colored. I didn't do this, and now I can see why I might want to do this. If you look closely at the photo, you can see that the two rows of white weft twining visually look different than the two-color weft twining. It does not bother me for this project, but again, it's interesting, and to note this difference when planning future projects.
Weaver-Speak: I am excited to do more two-color weft twining in the future and especially experiment with that little bead of color that can be produced by the twist. For this project, I made sure to tug the weft down to change colors, but it would be fun as a design element to use that "little bead" of color.
Lastly, and probably the most worrisome part of this project for me was what the heck to do with all the weft threads. Because I usually do 4 or 5 rows, a knot has been the way to go for me for it measures about the same as the band. But here, I felt a big knot or a bunch of smaller knots just wouldn't look right. I decided to try out a macrame square knot. Since this is the first time I've done this, I'm not sure if I will continue this way, but it felt like it worked for this project.
Oh, and I want to add that I did the weft twining under tension on my backstrap loom. There are lots of tidbits at Laverne's blog about weft twining, and if you want to learn how to do it, she had video tutorials here. Also, if you search the Ravelry Backstrap Weaving Group there is info/input to be gleaned there and project notes about twining.
Overall, I am happy with how it turned out, and I am building my skills for future projects!
Okay, now for the links: Weft Twining, and this book I got for $3 at amazon:
 |
| Taaniko, Maori Hand Weaving |
This book has fantastic pictures if you are a visual learner!
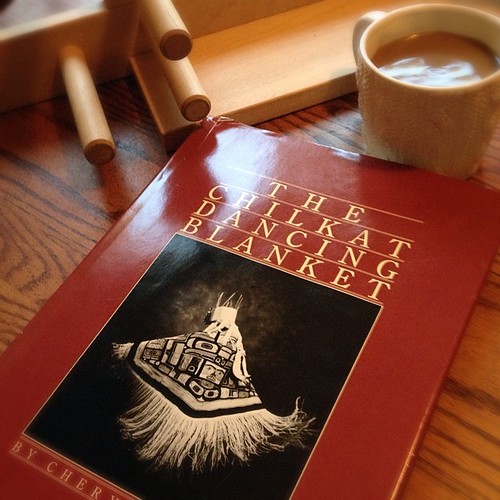
The Chilkat Dancing Blanket. I did not use this as a source for weft twining, but these blankets are made with twining. This book is about the Tlingit of Yakutat, Alaska to Vancouver, BC that wove these robes. The book includes origin stories, fantastic photographs, and instructions on weaving. This book cost about $12 on amazon, and was worth every penny.
I've got a few project ideas brewing and new techniques to learn! See you soon :)
No comments:
Post a Comment