A challenging cabled beret with a rolled brim. This is a great project for advanced beginners that will fuel your creative desire to cable. If using Cascade 220 yarn, this beret will fit the head circumferences below. If you want to add a bit more body for a roomier and slouchier beret add 8 sts on to your cast on #. Alternatively if you want a snug fitting beret, subtract 8 stitches from your cast on #.
Size: Approximately 19” to 21” Head Circumference
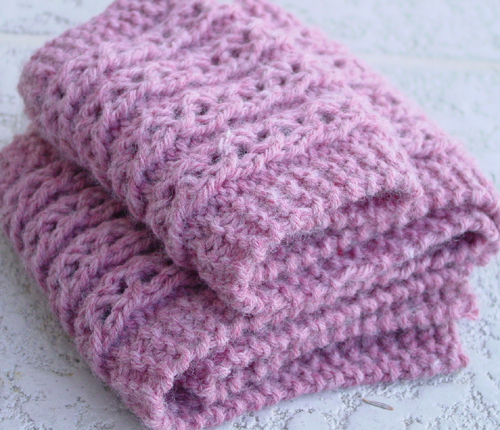
Yarn: Light Worsted Weight Wool Yarn (Cascade 220 Heathered Shown In Picture); Approximately 2 ½ - 3 oz.
Size: Approximately 19” to 21” Head Circumference
Yarn: Light Worsted Weight Wool Yarn (Cascade 220 Heathered Shown In Picture); Approximately 2 ½ - 3 oz.
Needles:
US Size 6 (4mm) – 16” Circular Needle
US Size 8 (5mm) – 16” Circular Needle
US Size 8 (5mm) Double Pointed Needles
Cable Needle
Markers
Darning Needle
Gauge: 5 sts = 1” on US Size 8 Needle
LEGEND
dpn(s) double pointed needle(s).
st(s) stitch(es).
rnd(s) round(s).
PM place marker.
k knit.
p purl.
tog together.
k2tog slip 2 sts knit-wise one at a time, transfer back to left needle, then knit these 2 sts tog.
p2tog purl 2 sts tog.
p2tog tbl purl 2 sts tog through the back loop.
ssk slip 2 sts knit-wise one at a time, transfer back to left needle, then knit these 2 sts tog through
the back loop.
wyif with yarn in front; move yarn to the front.
sl slip stitch purl-wise
psso pass slipped stitch over.
M1k make 1 knit: with your left needle, pick up the ladder formed between the next 2 sts from front
to back, then knit into the back of the ladder. It forms a twisted knit st.
M1p make 1 purl: with your left needle, pick up the ladder formed between the next 2 sts from back
to front, then purl into the front of the ladder. It forms a twisted purled st.
2/2 RKPC slip 2 sts to cable needle and hold at back of work, k2, p2 from cable needle.
2/2 LKPC slip 2 sts to cable needle and hold in front of work, p2, k2 from cable needle.
I-Cord please refer to a stitch dictionary or the internet for directions on how to work I-Cord.
Additional tips:
If you want to add or subtract slouch from the beret, you repeat or omit rnds 5, 12, 19, or 25 as you wish. Please note that the beret was not test knitted to add more slouch in this manner, but was test knit with less slouch with good results.
When cabling, try to relax and enjoy the process. Working too tight or too loose may result in uneven gauge. Just go with the flow, and try to keep your tension consistent.
This pattern is covered by copyright law and all rights remain with the designer. No part of this pattern may be reproduce in any form, transmitted in any form, or by any means, be it in print, photocopying, translation, or otherwise, in any format or under any circumstances without prior permission of the copyright holder. Similarly, not of the items made, or used for commercial purposes including promotion and/or sales, individual or otherwise, without prior permission of the copyright holder.
Using US Size 6 Circular Needle, Cast On 80 sts using Norwegian Long Tail Cast On Method. Join, being careful not to twist sts, and place a marker to designated the beginning of the round.
Knit 4 to 5 rnds (your preference) to form the rolled brim.
Work k1, p1 ribbing for 4 to 5 rnds (your preference) to form the ribbing.
Rnd 1: *(p1, M1p) 2x, p1, (k1, M1k), 2x, p1, M1p, p2, PM; repeat from *.
Rnd 2: Switch to US Size 8 Circular Needle. *p3, 2/2 RKPC, 2/2 LKPC, p2; repeat from *.
Rnd 3: *p3, k2, p1, M1p, p3, k2, p2; repeat from *.
Rnd 4: *p1, 2/2 RKPC, p5, 2/2 LKPC; repeat from *.
Rnd 5: *p1, k2, p9, k2; repeat from *.
Rnd 6: repeat rnd 5.
Rnd 7: repeat rnd 5.
Rnd 8: repeat rnd 5.
Rnd 9: *p1, 2/2 LKPC, p5, 2/2 RKPC; repeat from *.
Rnd 10: *p3, k2, p5, k2, p2; repeat from *.
Rnd 11: *p3, 2/2 LKPC, p1, 2/2 RKPC, p2; repeat from *.
Rnd 12: *p5, k2, p1, k2, p4; repeat from *.
Rnd 13: repeat rnd 12.
Rnd 14: repeat rnd 12.
Rnd 15: repeat rnd 12.
Rnd 16: *p3, 2/2 RKPC, p1, 2/2 LKPC, p2; repeat from *.
Rnd 17: *p3, k2, p5, k2, p2; repeat from *.
Rnd 18: *p1, 2/2 RKPC, p5, 2/2 LKPC; repeat from *.
Rnd 19: *p1, k2, p9, k2; repeat from *.
Rnd 20: repeat rnd 19.
Rnd 21: repeat rnd 19.
Rnd 22: *p1, 2/2 LKPC, p5, 2/2 RKPC; repeat from *.
Rnd 23: *p3, k2, p5, k2, p2; repeat from *.
Rnd 24: *p3, 2/2 LKPC, p1, 2/2 RKPC, p2; repeat from *.
Rnd 25: *p5, k2, p1, k2, p4; repeat from *.
Rnd 26: repeat rnd 25.
Rnd 27: *p3, 2/2 RKPC, p1, 2/2 LKPC, p2; repeat from *.
Rnd 28: *p3, k2, p5, k2, p2; repeat from *.
Rnd 29: *p1, 2/2 RKPC, p5, 2/2 LKPC; repeat from *.
Rnd 30: *p1, k2, p9, k2; repeat from *.
Rnd 31: *k2tog, k1, p9, k2; repeat from *.
Rnd 32: *k2tog, p9, ssk; repeat from *.
Rnd 33: *k1, p9, k1; repeat from *.
Rnd 34: *k1, p2tog, p5, p2tog tbl, k1; repeat from *.
Rnd 35: *k1, p7, k1; repeat from *.
Rnd 36: *k1, ptog, p3, p2tog tbl, k1; repeat from *.
Rnd 37: *k1, p5, k1; repeat from *.
Rnd 38: *k1, p2tog, p1, p2tog tbl, k1; repeat from *.
Rnd 39: *k1, p3, k1; repeat from *.
Rnd 40: *k1, wyif sl1, p2tog, psso, k1; repeat from *.
Rnd 41: *k1, p1, k1; repeat from *.
Rnd 42: *sl1, k2tog, psso, and remove markers; repeat from *.
Rnd 43: *k2tog; repeat from *.
Rnd 44: k2tog, k2tog, k1 (4 sts left).
Work I-Cord long enough to form a knot at the top (approximately 1 ¼ inches) fasten off and knot. Darn in all ends. Wash and block, being careful not to stretch the rolled brim. Wear with joy!
Copyright 2009 – Kimberley Cunningham Varland – Rabbitbrush Studio - Big Sky Mountain Designs
Ravelry Link: http://www.ravelry.com/patterns/library/orland-cabled-beret
Copyright 2009 – Kimberley Cunningham Varland – Rabbitbrush Studio - Big Sky Mountain Designs
Ravelry Link: http://www.ravelry.com/patterns/library/orland-cabled-beret